
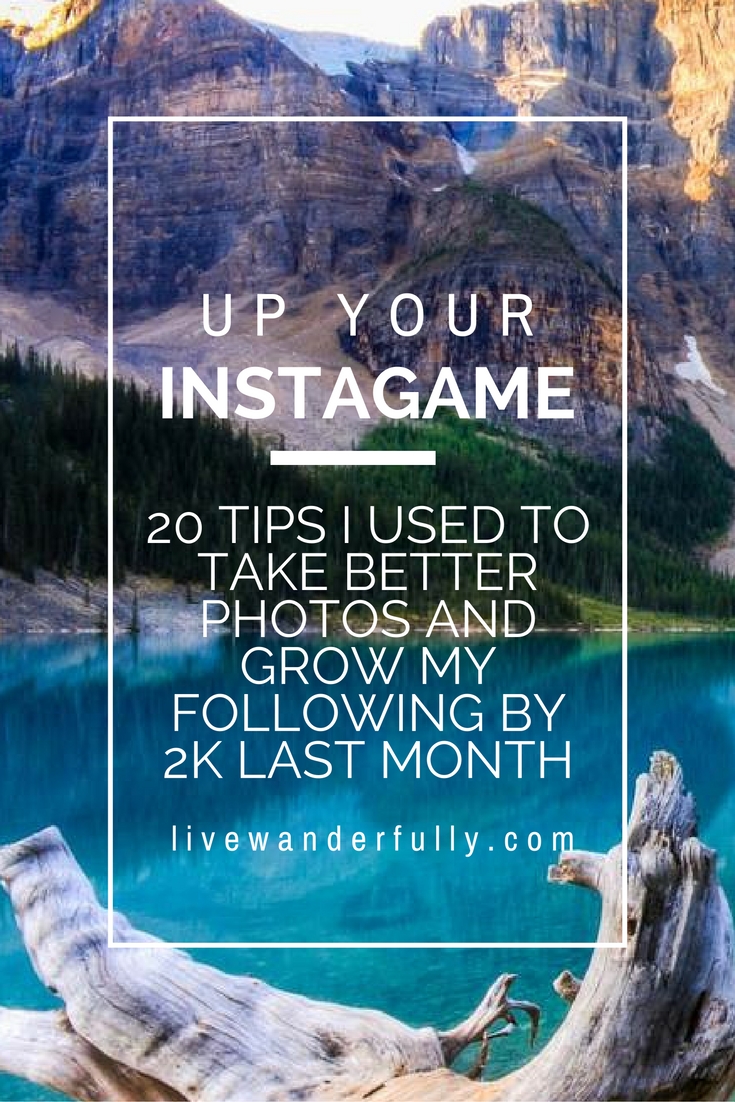
So you want to become an Instagram star? I don’t blame you – Instagram now has 400 million active users and 30% of people on the internet. Every day, 80 million photos are shared, totalling over 40 billion photos over the course of Instagram’s existence. I’ve compiled a list of Instagram tips and tricks that are tried and tested. I swear by these guidelines and have used them to make Live Wanderfully a consistent and well-known brand in the Instaworld.

#1 Take lots of photos
The fact of the matter is that 99.9% of my photos are complete trash. The other 0.1% of them are partial trash, but I snap so many that I have hundreds of partial trash photos! Not all of the photos you take are going to be excellent, or even good, but if you take more of them, you’ll have a larger selection to choose from when editing. When I’m out in the field, taking travel photos, I take 4 to 5 photos of the same subject from the same place before moving on, even if the first few seem great to me then, because when I get home and upload, I almost always notice problems. Discombobulated heads seem to be my specialty. Once, I took a travel photo of me walking into the distance and picked up the camera, only to find that a jogging man in a wifebeater looked more like the subject than I did!


My camera, the Canon G12
#2 Know thy device
One of the biggest struggles I have when taking photos is that my one true love camera (Canon G12) doesn’t come with a wide angle lens, which means that as soon as I bring the viewfinder to my eye, the beautiful gorgeous awe inspiring landscape I was just admiring is now cut by about 50%. Different cameras have different faults. Some don’t have as much depth of field, others don’t take sharp images, and most don’t work that well at night. Knowing how and where your camera works best will help you get the best shots possible.

#3 Don’t use the Instagram camera
Instead, use your normal phone camera, a point and shoot, or a DSLR. All of these have more capabilities than the Instagram camera, which only gives you one shot (get it? I’m so funny I could be a comedian please laugh at my joke) to take a photo of an Instagram worthy moment.
#4 Stay alert for perfect photo ops
The best moments are over in seconds. When I’m travelling, I have my camera looped around my neck and on at all times (sometimes I have to go for a midday charge but it’s completely worth it) so that when I see a photo worthy moment, I’m ready to whip out my camera and snap a shot. This works particularly well when I’m in an area with a lot of people. It really captures the local flavour when I’m able to take a photo of a fruit vendor selling his goods or some schoolchildren crossing the street.
#5 Dress the part
When you’re taking travel photos of yourself, make sure you’re dressed up to take some awesome, fashion savvy photos. Dresses that look good in real life may actually look fairly frumpy in photos. I’ve discovered this the hard way, so when I think up outfits to use when I’m travelling, I always go for a test run at home first, to make sure they look as gorgeous as I imagine them to be.

#6 Be aware of the lighting
Different kinds of days have their strengths and weaknesses. Sunny days come with beautiful baby blue skies and fluffy white clouds, but also cast harsh shadows on whatever you photograph, making a building seem overly dark in comparison to the sky behind it, or giving photographees instant and intense tans. That’s why its best to take landscape shots when it’s really bright outside. Cloudy days work great at diffusing light, but your background might seem unnaturally colourless in comparison, which is why I take advantage of cloudy days for architecture, city, and closeup shots. The hours surrounding sunrise and sunset create beautifully colourful compositions, as well as coffee addicted bloggers who groggily long for the warmth and comfort of their beds. It’s best to shoot with natural light, because artificial lights will never measure up to the real deal. One last thing: it’s best to leave flash off, unless you’re going for the “washed-out drunken bush party” effect.
#7 Angles, angles, angles!
Play around with how you take your photos. Take them from up high. Take them from down low. Look for interesting formations within your subject. Think of things from a different perspective. You’d be surprised to see what you can come up with, and some of your images might just be so visually compelling that they’ll get thousands and thousands of likes! After all, that is the end goal here!
#8 Framing the photo
There’s a lot of great photos out there that use elements in the scene to frame the rest of the photo. Try using a tree or hedge to bound one side of your shot, or shoot through a doorway or arch! Pillars, corridors, bookshelves, railings, stairways: they all work great as borders. Oftentimes, you’ll get a super fun image from a whole different perspective!
Related: Check out these awesome travel Instagrammers
#9 Editing
They say that editing is half of the photo. I don’t know who “they” are, or even if “they” say that, but “they” are right! Editing might just be the hardest part of taking photos because after your exotic vacation, you have to plop your derriere down on a wheelie chair and sift through hundreds of photos, many of them almost identical and, if you’re like me, most completely unusable. But editing is also where the magic happens. I love using the completely underrated Windows Photos program to make minor adjustments to my shots. It’s great for adding filters and changing the brightness and colour settings, and I can really see the difference between my cheating edited photos and my trash original ones. For bigger booboos, my go-to is Photoshop. I’ve masted the lasso tool, the magic wand, the clone stamp, the right click, and essentially nothing else, but it works wonders at replacing photobombers with a whole lot of nothing. Pro tip: sometimes, you can also fool around with the clone stamp to end up with magical little gems like this!

I’ve also heard that VSCO and Snapseed are particularly good for editing photos, but haven’t personally tried them because I never edit my photos on my phone and I’m waay too cheap to purchase filters on an app.
#10 Rule of thirds
This is something that I swear by. It’s a really handy tip, especially for beginning photographers, that tells you to put the most interesting elements of your photo at power points, the intersections of the lines, and to put any natural lines in your composition along the thirds lines as well.

Of course, you’ll find amazing photos that break this rule as well, but if you’re a beginner, or pressed for time, this will generally give you a reliably good shot. Most camera and phone screens have a built in thirds line feature, if you’d like to turn that on.
#11 Foreground, fiveground, sixground
If you want a photo that has a lot of depth, use the elements in your composition to your advantage by creating a foreground, midground, and background. For(e) example, you could take a photo of a friend (foreground) standing in front of some hills (midground) with a nice blue sky (background). Photos with more depth tend to look more interesting.

#12 Avoid grossness
Do you think your photo looks gross? You know that feeling: the “ew, something isn’t right about this photo, it makes me feel uncomfortable” feeling. If you answered yes to that question, that’s probably because your photo is gross. Usually, photos are gross for two reasons: 1. They are not tinted right and 2. The lens you were shooting out of was dirty. For those reasons, make sure to play around with the colours on your editor, to avoid making your photos gross, and wipe your lens before taking photos to get the sharpest, cleanest, crispest image you could possibly get.
Related: Need travel inspiration?
#13 FOOD!
You and your travel buddy are sitting down to a hard earned hearty supper after a long day of exploring. Your buddy’s just about to dig in when you whip out your phone. “Wait!” you cry. “What?” he asks, startled. “Let me take a photo of it first!” He facepalms as you proceed to take hundreds of barely usable photos of his dinner.
It’s really hard to take good food photos. The most delicious shades of burnt sienna, ochre, and caramel will all turn to uniform brown beneath the judgmental eyes of your phone. But only you can prevent forest fires uniform brownness. Choose the most colourful plates to memorialize in your IG feed. Turn up the brightness and the saturation. Shoot from right above the plate, or at the same level as it. And for heaven’s sake, do it during daylight hours!
#14 Solo travel photos

Yeesh, these are the most time consuming because you aren’t behind the camera! The experts out there suggest for us to find the perfect manual setting for the scene and hand our cameras over to unsuspecting victims to our zeal for travel fellow travellers and locals, but really, for us noobs who can’t use the manual settings on our dinky point and shoots (ain’t nobody got time to learn that!), we need a better option. Hence, I present to you, the lowly Gorillapod.
Well, really, it isn’t that lowly. Unless you got one cheap from Chinese Amazon (I fully did not do that). But I’m a huge fan of the Gorillapod because of how versatile it is. You can turn almost anything into a tripod just by wrapping a Gorillapod around it. Find a good angle, set your camera on continuous shooting mode, and snap away. Make sure to change up your posture, facial expression, and actions, and repeat this at least twice so that you can adjust the focus, brightness, and angle after the first time around.
#15 Obligatory sunrise/sunset pics
Sunrises and sunsets are undoubtedly some of the easiest good photos that anybody can take. By the time I hold my camera up to the scene, 95% of the work has already been done for me, in the form of lighting, framing, and colour. Sunrises and sunsets on different days and in different places give off a wide variety of colours, from blazing orange and red to pale pinks and purples. Adding an extra bit of saturation and contrast while editing can turn your sunset/sunrise photo from good to excellent.

#16 When one uploads to Instagram
When uploading to Instagram, there are a few things to consider. First of all, to crop or not to crop? Landscape orientation photos, I find, typically get fewer likes than square and portrait orientation photos because in an attempt to squash all of your images within the width constraints of your phone, Instagram will often make your landscape photos teeny tiny. I like posting square and portrait photos for that reason, as they fill up the screen.
If your account isn’t private, use hashtags. I suggest using 10-12 to get good exposure while at the same time making sure that your caption isn’t a bleeding mess. Write a genuinely engaging caption. Questions (e.g. Have you ever been to ___? What are some of your favourite ____?) are really good at prompting total strangers to comment on your post with their opinions, but if your brain is totally fried and you can’t think of anything, Google a travel quote and stick it in. Hey, it’s better than nothing!
One feature that I really love about Instagram is its Lux feature. Almost all of the time, turning up the Lux on your photo to 50 will make it look so much better. For those of you who haven’t used it before, click the black and white sun on the top of the editing screen to access it.

#17 Overall feed appearance
Make sure to return periodically to your account to see how it looks overall. Sometimes, even after uploading, some photos need to be tweaked or deleted to make your account seem more cohesive. Try to determine if your feed is lacking in one particular type of photo, or if your future photos need to be heavy in one colour, angle, or brightness. This will give you a better idea when you’re shooting in the field of what you want or need to capture.
#18 Do your research
Before I go to a new place, I’ll figure out where to take the best photos. I’ll start with Google Images, to find a map of the area as well as overdone yet still enduring classic photos that I might want to take. Next, I’ll locate the area on Instagram, either through a tag or through the map, and see what crazy things the rest of the Instagram community has been up to at that location. Finally, once I get there, I’ll ask a local or two where they’d recommend I take some photos. They’re usually very obliging and nice and will point me to an angle or view I would have never thought of.
#19 Is it likes that you’re after?
Three years ago, Curalate wanted to find out what kind of photos got more likes on Instagram (we can only guess this was because their account wasn’t doing so well), so they pored through millions of photos to figure out what they were doing right.
In short, they found that brighter photos, photos with more background, photos with a single dominant hue, bluer photos, photos with low saturation, and more textured photos generated more engagement. (They also found that duckface selfies generated more than 10 times the likes than normal selfies, so I really don’t know what to believe here)
View the full results here.
#20 Don’t worry, the photos are worth the judgement
Really, they are! I can’t tell you how many times my friends have posted embarrassing photos of me, hunched over, crouching on the ground in the Chinese farmer squat position, holding a camera in one hand while wildly gesticulating with the other, my brow scrunched up in concentration and my tongue between my teeth. There will be times when your quest for Instagram fame will earn you the stares, chuckles, and indulgent smiles of strangers. But just remember, at the end of the day, they won’t have as many nice photos of the world as you will.

Inspirational, thank you
LikeLike
Thanks for the comment!
LikeLike
Great post! I publish photos on Instagram pretty much every day so thank you so much for lal those tips! 🙂
LikeLike
Thanks for the comment! Have fun Instagramming!
LikeLike
This is quite comprehensive and very useful. I thought it was a very creative article as well. Thanks for sharing your thoughts, tips, and ideas. Will certainly use them.
LikeLike
Thank you!
LikeLike
I am not an Instagram addict but I am an amateur photographer and even if I don’t upload my photos on Instagram, I do post them on my blog. I usually think and frame the composition in my mind before taking a snap. Knowing your camera and your lens is very important.
LikeLike
It is! There are so many camera functions and it always surprises me when I learn something new about mine, just when I thought I had gotten to know everything!
LikeLike
I have been looking for photo tips. What is the cost of the Canon G12? I am looking for an actual camera in additional to my iPhone. How do I get to the Lux feature?
LikeLike
You can open the Lux feature by pressing the sun icon in the middle of the top of the screen when you’re editing your IG photo. We bought our G12 a few years ago, but right now, it appears to be about $400 new and $150 used. It’s a really solid beginner-intermediate camera; the only complaint I really have about the camera is that it’s not great at taking photos at night.
LikeLike
Gosh, there is so much that goes into this. I never do all this stuff. I guess the more you do it, the easier it becomes and the faster you get at preparing the camera to take the best shot. I never knew about the lines but will try and test it out.
LikeLike
The rule of thirds has probably helped me the most when taking photos; I highly recommend it!
LikeLike
I never do all of these things! And I’m taking lots of pictures while I’m out and about on trips. These tips will help me a lot in my future photo taking and editing!
LikeLike
Glad to have been of help!
LikeLike
Thanks for the tips. Passion + DSLR + Patience + Lightroom = Stunning Photos
Here is my e-book on complete guide to landscape photography http://imagineescapades.com/store/
LikeLike
Cool, I’ll check it out!
LikeLike
I have just started using instagram and this looks like a great place to start. Thanks for sharing.
LikeLike
Good luck on IG!
LikeLike
Great post thanks for the tips!
LikeLike
Thank you!
LikeLike
I must be doing something else wrong because I do follow all the points you recommed here, and there’s no way to get to 500 followers haha. I’ve always loved photografy but somehow instagram does not completely make it for me, barely 1% of my blog traffic comes from there. Also, I have come to realize that posting on Thursdays usually brings much more interaction that any other day. Don’t know why =). In any case, if you have the time, what would you improve in my insta (https://www.instagram.com/thesolivagantsoul/) ? I’m open to any type of suggestions!
LikeLike
I really like your feed! One thing I would suggest is to do some follow-for-follows, especially at your size, to get the ball rolling, because people are more likely to follow accounts that already have more followers. Another thing I would suggest is to use hashtags that aren’t as populated, so that your photos have a chance to get into the top posts section. Good luck!
LikeLike
I loved your post. I do follow some of the tips like the rule of thirds, editing, even cropping at times. I try and keep pp to the minimal cause I like the natural way the photos have been taken. i dont do pp unless absolutely required.
LikeLike
Thank you!
LikeLike
Some of the tips are very useful and valid. I was completely unaware of them.
My photos must improve after this.
LikeLike
Good luck, I’m sure they’ll be awesome!
LikeLike
Great post. Very comprehensive list of tips, this could even extend to basics of photo composition post, not just Instagram.
LikeLike
Thank you!
LikeLike
I think your post should be better titled how to take better travel photos in general, since so little of what you say is limited to the ‘gram. This is advice every traveller needs.
LikeLike
That’s true! For me, most of my photography is geared towards IG so I just titled it that way 🙂
LikeLike
Very helpful tips, indeed! I am still working on with the rule of thirds mastery as well as editing. I really suck! Aside from Photoshop, what mobile apps do you use? I sometimes notice that the photo quality suffers after uploading in Instagram so I want to know how to edit it well.
LikeLike
I haven’t had a quality issue with IG yet, and I don’t really use mobile apps for editing (my thumbs are too big!). Instead, I use WIndows Photos; it’s so underrated but it works so well!
LikeLike
These are some great tips! I’m kinda obsessed with my gallery — once a month, I go through and delete what no longer fits my theme. I haven’t yet mastered the solo travel photos, I need to get another tripod stand.. thanks for recommending the gorilla one, it looks quite sturdy. Now, I’m off to follow ya on insta! 🙂
LikeLike
Thank you!
LikeLike
These are some great tips! I’m kinda obsessed with my gallery — once a month, I go through and delete what no longer fits my theme. I haven’t yet mastered the solo travel photos, I need to get another tripod stand.. thanks for recommending the gorilla one, it looks quite sturdy. Now, I’m off to follow ya on insta!:)
LikeLike
#10 Rule of Thirds! I spend so much time telling people about this.. it is nice to see you also follow it! I am fairly new to the Instagram game and have not really figured out a consistent theme or hashtag strategy, but I really like what you said about using engaging captions. It’s the same policy for blog post titles, so that totally makes sense. I will try doing that from now on and see how the followership goes. And if you want to follow me, I am at @judsonlmoore 🙂
LikeLike
Good luck!
LikeLike
Interesting post! I’ve been doing some research about Instagram and photos that are attractive for the general viewer. I like to stick to my own style though, I don’t really like to follow the ‘mainstream’. But doing research and reading tips, like in your post, is giving me good ideas and new perspectives about photography in general. I learned a bit more again thanks to this great article. Thanks for sharing your tips with the (Internet-Instagram) world!
LikeLike
Thank you! Haha, not sticking to the mainstream, I like that!
LikeLike
Agree to be a top instagrammer there is so much to do. Great tips! We usually just post what we capture and have never thought of these tips, may be its time to work on these. 🙂
LikeLike
Thanks!
LikeLike
Super informative post, and really relevant today. Thanks so much for sharing your tips and tricks! 🙂 Really love your blog’s layout as well.
LikeLike
Thank you!
LikeLike
Great tips! For me, I definitely have to take loads of pictures with the hope that at least one of two will be good enough for Instagram.
LikeLike
Thanks!
LikeLike
These are great tips, and funny too:) I’m always horrible at dressing the part – esp since most of my photos are camping hahah. But this is great motivation to get my act together😛
LikeLike
Thank you!
LikeLike
Thanks for these tips. I’m not a great photographer–my passion is writing–but I’m trying to learn. I am glad to know that most of your photos don’t come out right either. It will encourage me to just take more pictures!
LikeLike
Thanks!
LikeLike
Great tips shared! Instagram plays an important role for any travel bloggers to expand their audience!
LikeLike
Thanks!
LikeLike
Thanks for numerous tips! I only took lots and lots of photos and most of the time got lazy to curate, then I’ll only get back when I’m back in my mood. Sometimes I think I need focus just to uplift my IG game.
LikeLike
Thanks!
LikeLike
Those are some excellent tips… and your photos look amazing.
I would like to add one more tip for Instagrammer: Create a mise en scene in your photo, make it become narrative, put some story in it. People will want to jump in it.
LikeLike
Thanks! That’s a great tip!
LikeLike
Thank you so much for your tips! I love instagram and I like posting there, but I don’t have that much growth 😦
I will now follow your suggestions and share them with my followers
LikeLike
Thanks!
LikeLike
Great tips you’ve shared! So agree on the instagram camera! It’s like it was made to make your phone camera ten times worse! I do try to use my dslr for pics, but the phone rules for quick, in the moment, instagram updates.
LikeLike
Thanks!
LikeLike
Great ideas and tips you have provided here in this post. IG presence is definitely important for Travel Bloggers these days and such a post is very useful for many of us. Thanks for this
LikeLike
Thanks!
LikeLike
Wonderful round up of ideas to take better changes.Many of them are very practical and sensible. The rule of thirds is one of the most important of course.
LikeLike
Thanks!
LikeLike